下合页配件简介
STAFORCE 30104/30105隐藏合页采用锌合金和SUS304不锈钢材料制造,通过精密加工工艺确保每个合页都能承受长期高频使用。
该系列合页支持三维调节(高度调节±3mm,水平调节±1.5mm),配备摩擦力调节功能,启闭顺畅。承重能力达50KG,确保窗扇稳定可靠。
通过严格的盐雾测试(SST500H,符合ISO9227标准)和欧洲标准认证,启闭寿命达25000次,提供10年质保,为您的门窗系统提供持久的可靠保障。
内开内倒 - 下合页

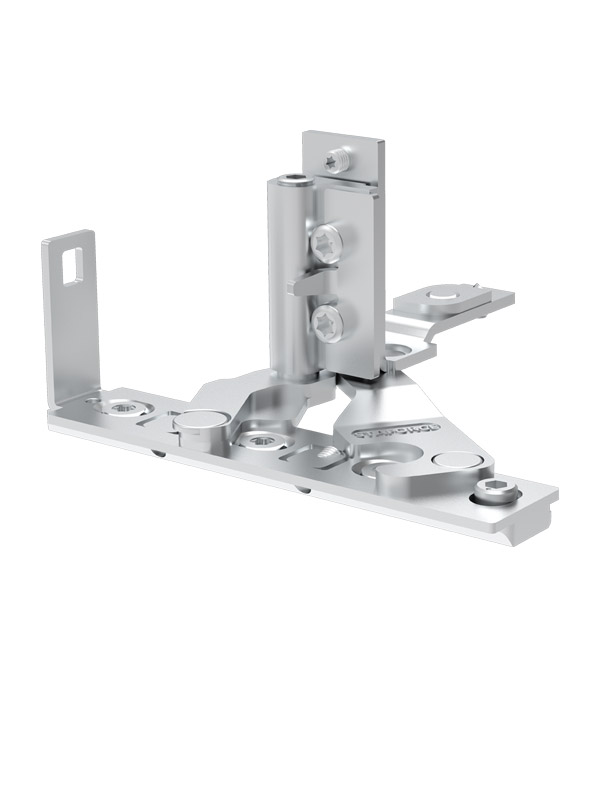
下合页产品图
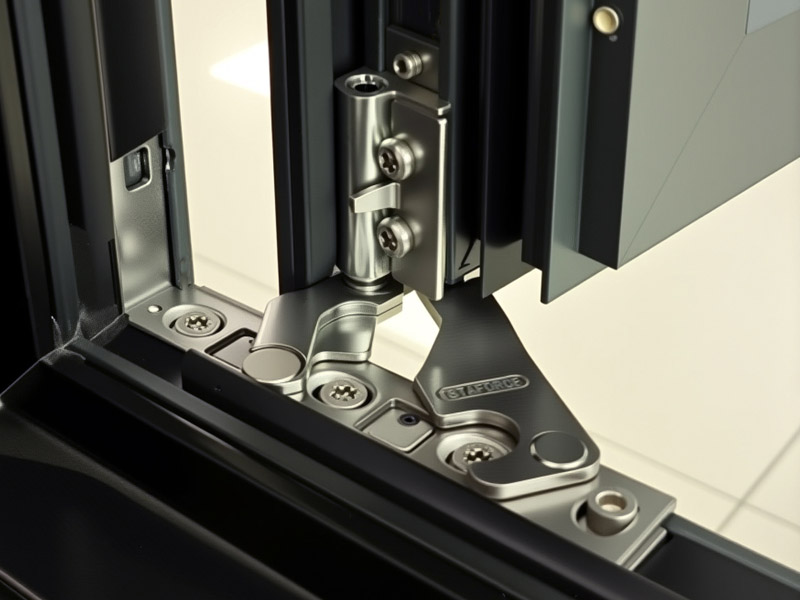
下合页细节图
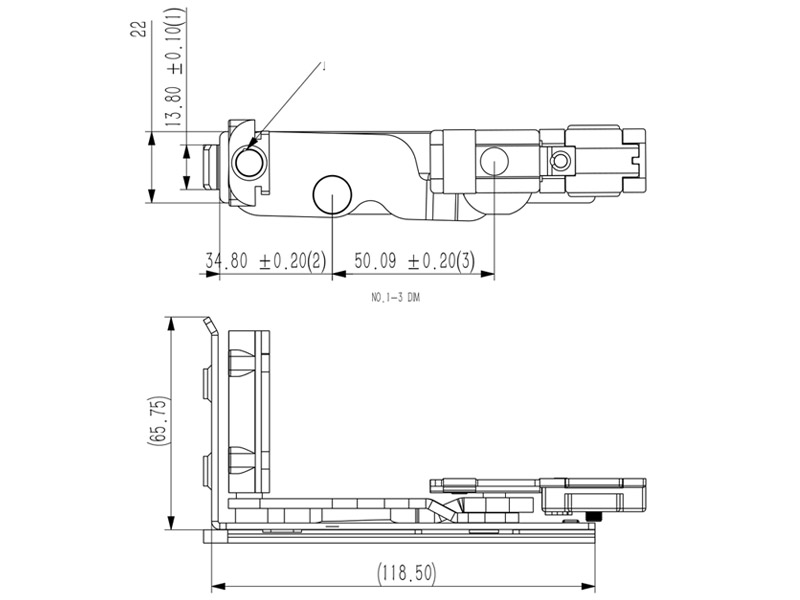
尺寸图
技术参数
- 1.产品名称:30104/30105隐藏合页
- 2.产品材料:锌合金/SUS304不锈钢
- 3.盐雾测试:SST500H,符合ISO9227标准
- 4.性能特征:高承重,高寿命,三维调节,摩擦力调节
外开定位隐藏合页优点
- 1.高度调节+-3mm
- 2.水平调节+-1.5mm
- 3.承重50KG,启闭25000万次符合EN1911标准
- 4.摩擦力调节
- 5.10年质保
Tilt & Turn Installation Instruction
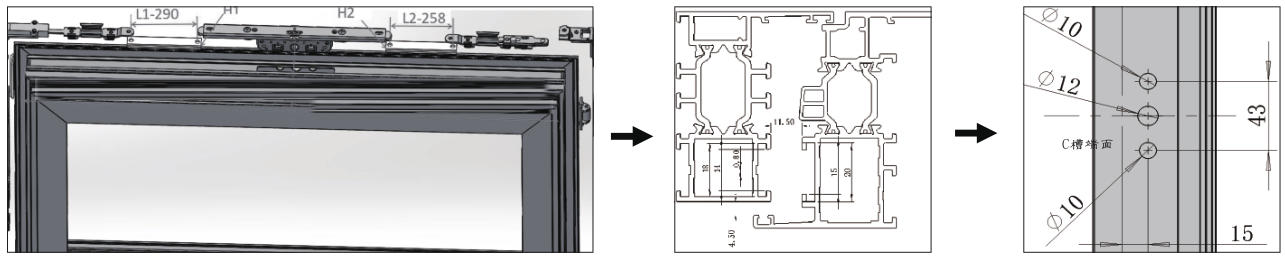
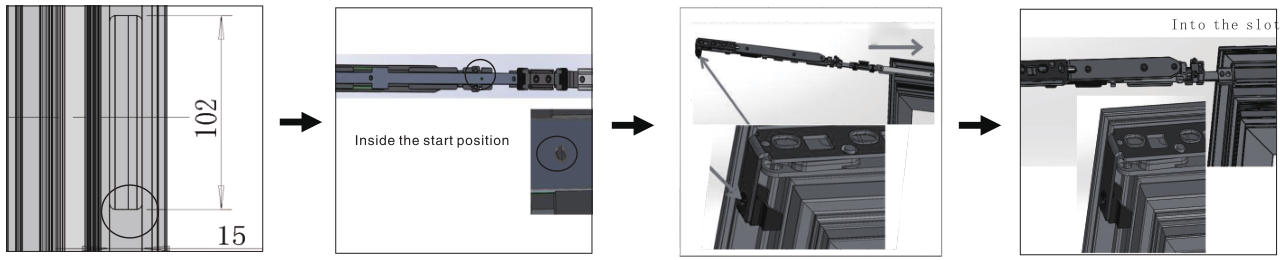
Installation Step 1

Insert the tilt control unit to the side of C-Groove.
Connect to the corner piece to the Tilt control Unit.
Profile drawing applicable to formula of calculation hole demesion of Transmission bar.
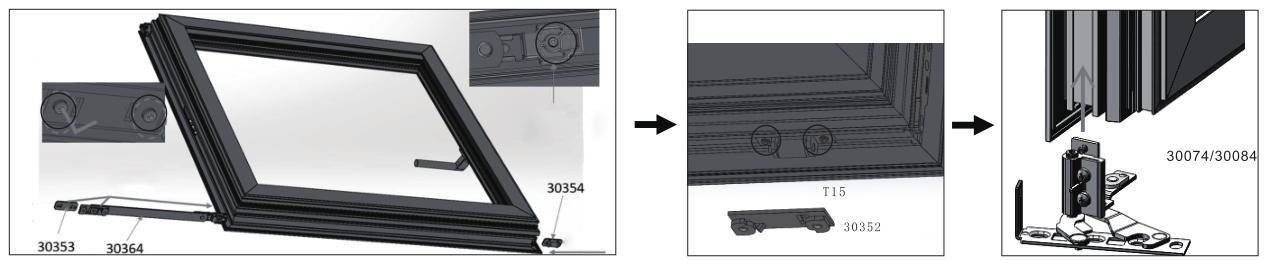
Installation Step 2
Friction Stay: Put support 300354 into C groove of Sash.
Insert the item 30074/30084 into C-groove of Sash.
Put the Friction stay into C Groove and put the position block it to C-Groove as well.
Open the sash to 90 degree and tighten the screw of Friction stay, tighten the screw of the Frame side.
Installation Step 3
The Formula for cutting the transmission bar in Length.
Profile that is Applicable to Holes for Handle installation - see the picture.
Installation Step 4

The dimension of Milling on C groove for Gear Box.
Check the Control Arm 2023 M/L is in the initial position (fix point).
Insert the Control Arm into C-Groove and couple it with corner Piece.
Couple the Corner piece and Control Arm.
Installation Step 5
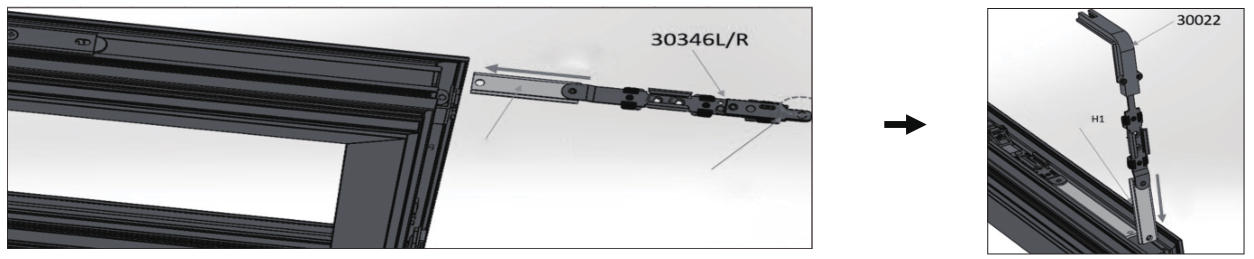
Couple the Corner piece and the Upper side transmission Bar.
Tight the corner Piece with T15 screw.
Adjust the Hexgon 4mm screw as to the picture for Horizontal adjustment.
Tight the control arm with T15 screw driver.
Installation Step 6
Adjustable Rivet-0-90 Degree for 1.5mm horizontal direction, the initial position is facing to the side as to picture.
Tighten the set screw M5 from the bottom side.
Height adjustment as to the picture, Hexgon driver 4mm.
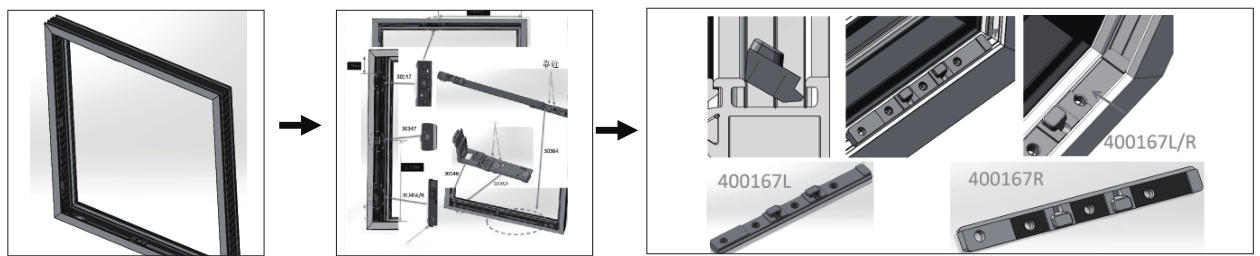
Installation Step 7
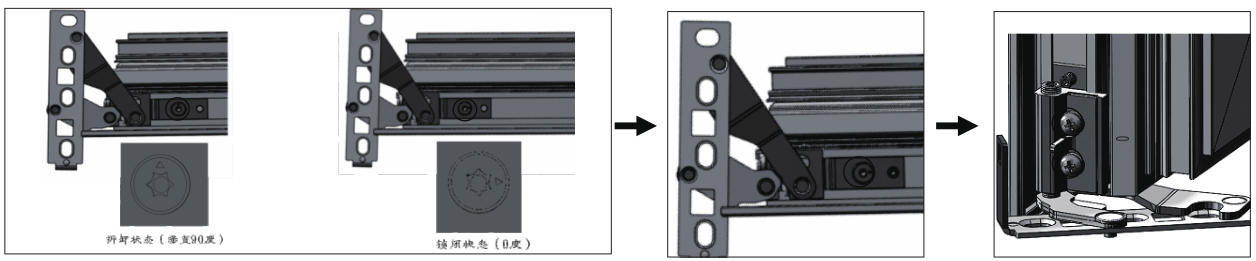
Put the strikers, socket, friction stay on the frame and fix it.
As to the picture, tight the screw with T25 screw driver and clamping the hinge to the frame.
Installation Step 8
Put back plate into Frame Groove and position it to the end of C-Groove.
Then tighten the angled screw from the sloping hole.